
Motor on the mounts, passenger header and trans is basically in place. I filled the Napa 1258 oil filter with Lucas 30W break in oil. The Canton 6 qt pan is even with the crossmember, pretty ideal.
My 1970 Oldsmobile Cutlass S
- Thread starter Olds 307 and 403
- Start date
You are using an out of date browser. It may not display this or other websites correctly.
You should upgrade or use an alternative browser.
You should upgrade or use an alternative browser.
Dumped the break in oil in the crankcase. The temp sensor plug and drain plug still has minor seepage on the Canton pan. I got the drivers header in place and the motor mount cross bolts in and tight. I also got some minor body work started.
I cut and ground the crossover plugs in the heads. I got the intake on with the Mr Gasket Ultraseal intake gaskets. I used Aviation sealant on the head side and The Right Stuff around both sides of the water ports and a narrow 3 bead tall bead on the end rails. The 12 point 3/8" reduced head and hardened washers fit great!, love the free price. It barely fit, the intake is definitely at the top of the ports.
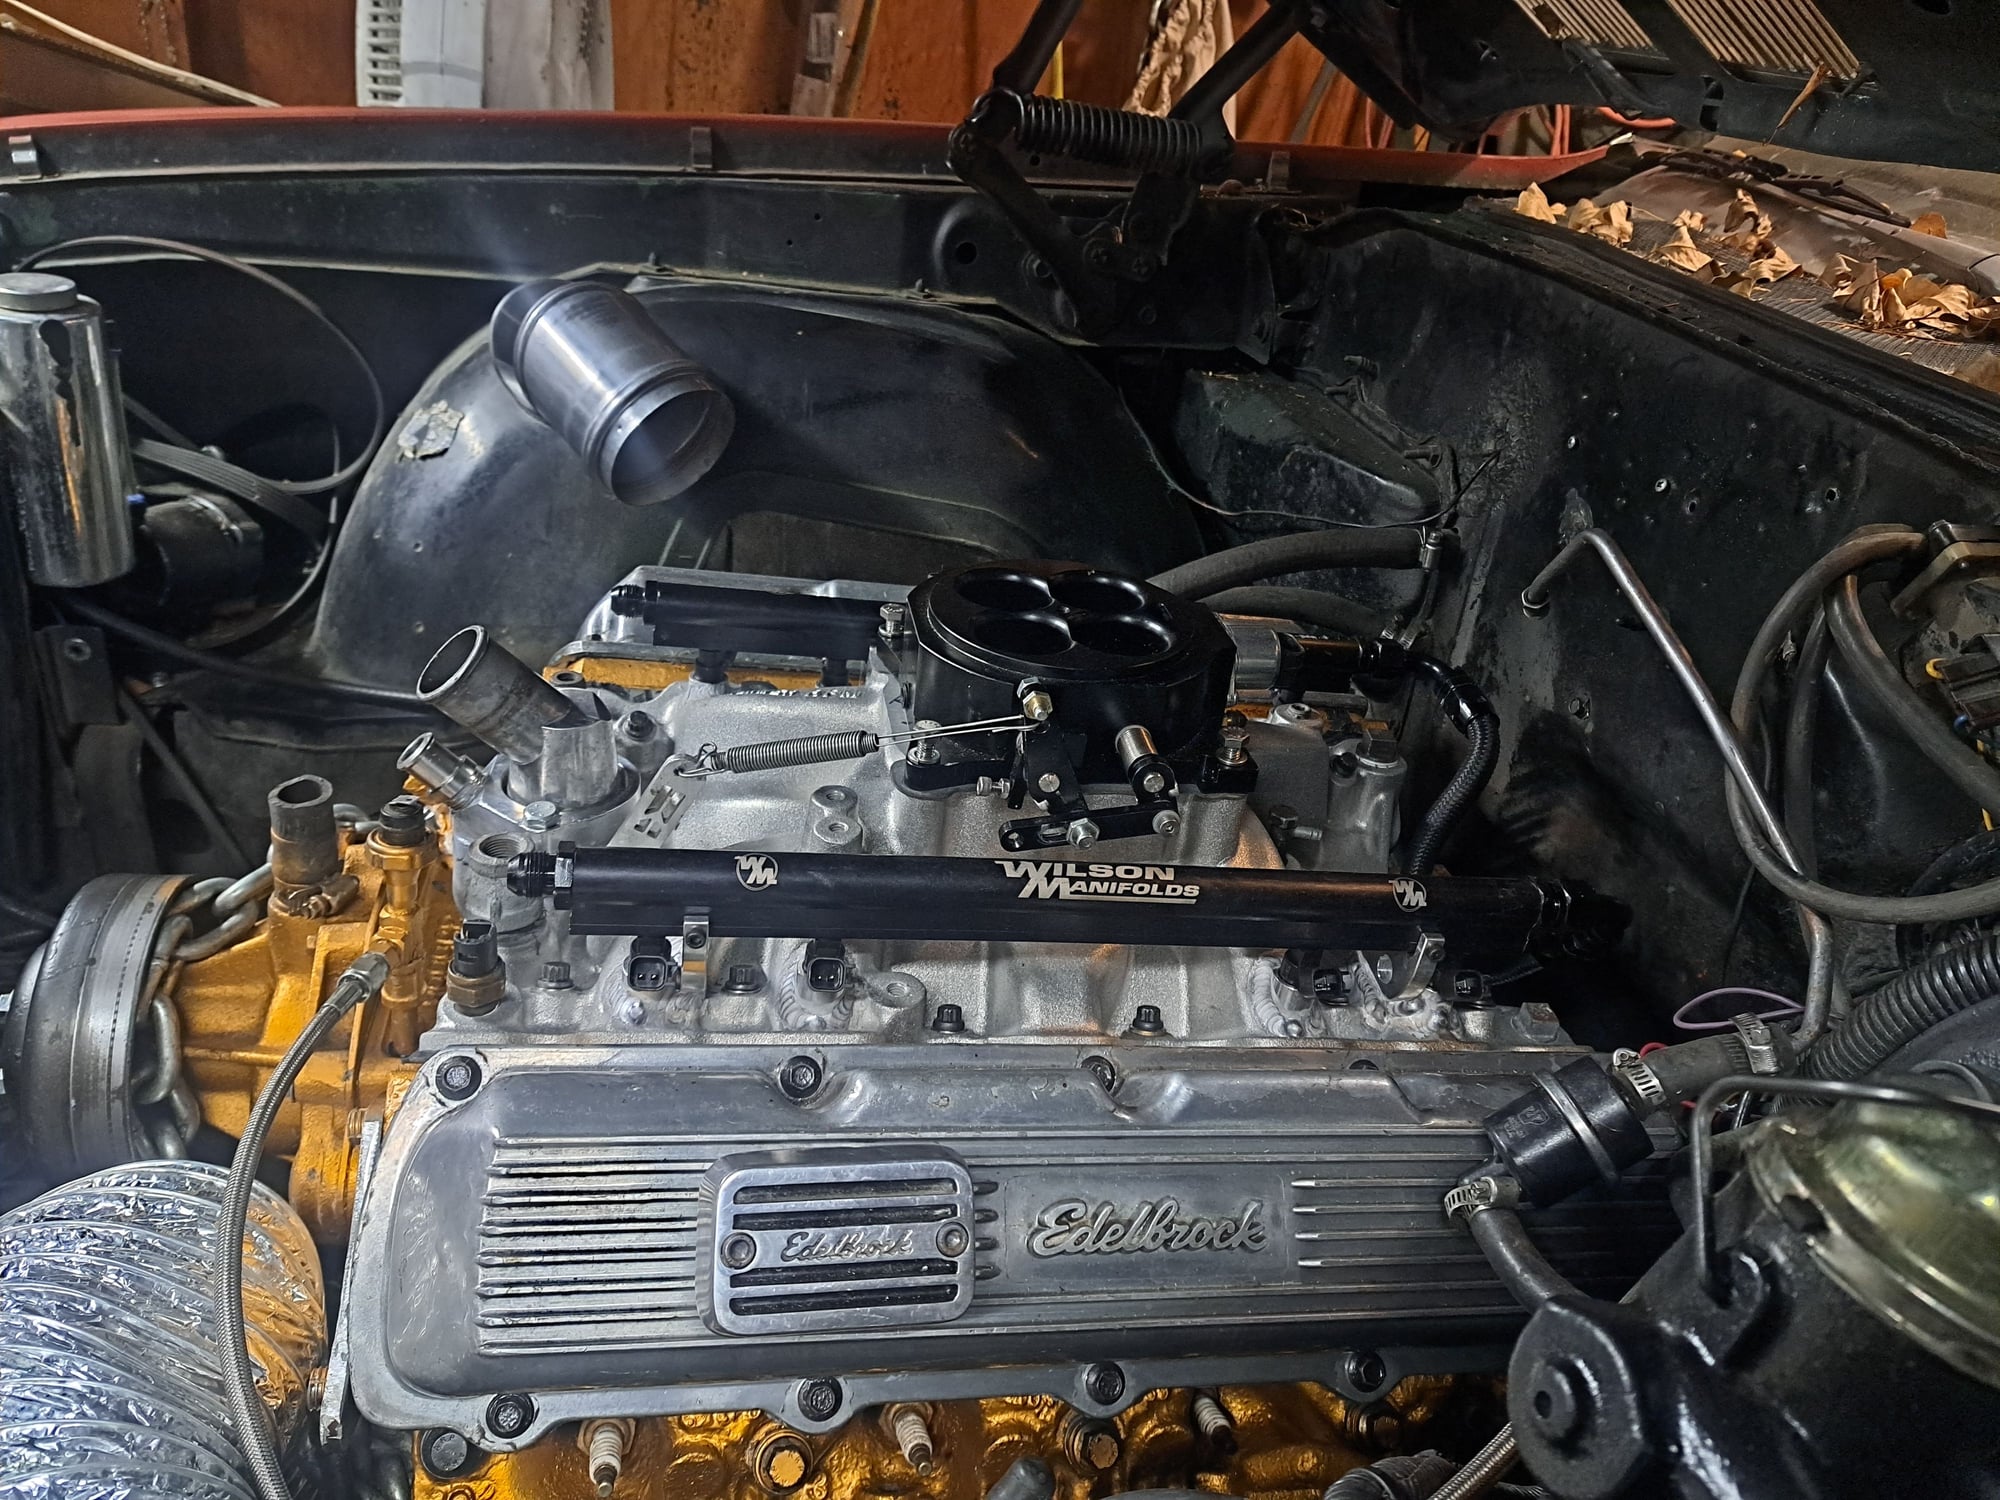
The 2004R, dipstick, exhaust, linkage driveshaft and lock up wiring are in place. I ordered a new braided universal chrome cable for the 2004R, factory one seperated from the base. I may need a more adjustable cable for the Holley throttle body anyways. Of course a struggle, I had to remove the round protrusion from the torque converter snout in the picture, it was hitting the the pilot bushing and mildly touching the inside of the crank as well. I am using 3 washers between the converter and flex plate, could probably fit 4, so there should be clearance at the pump and pilot area.
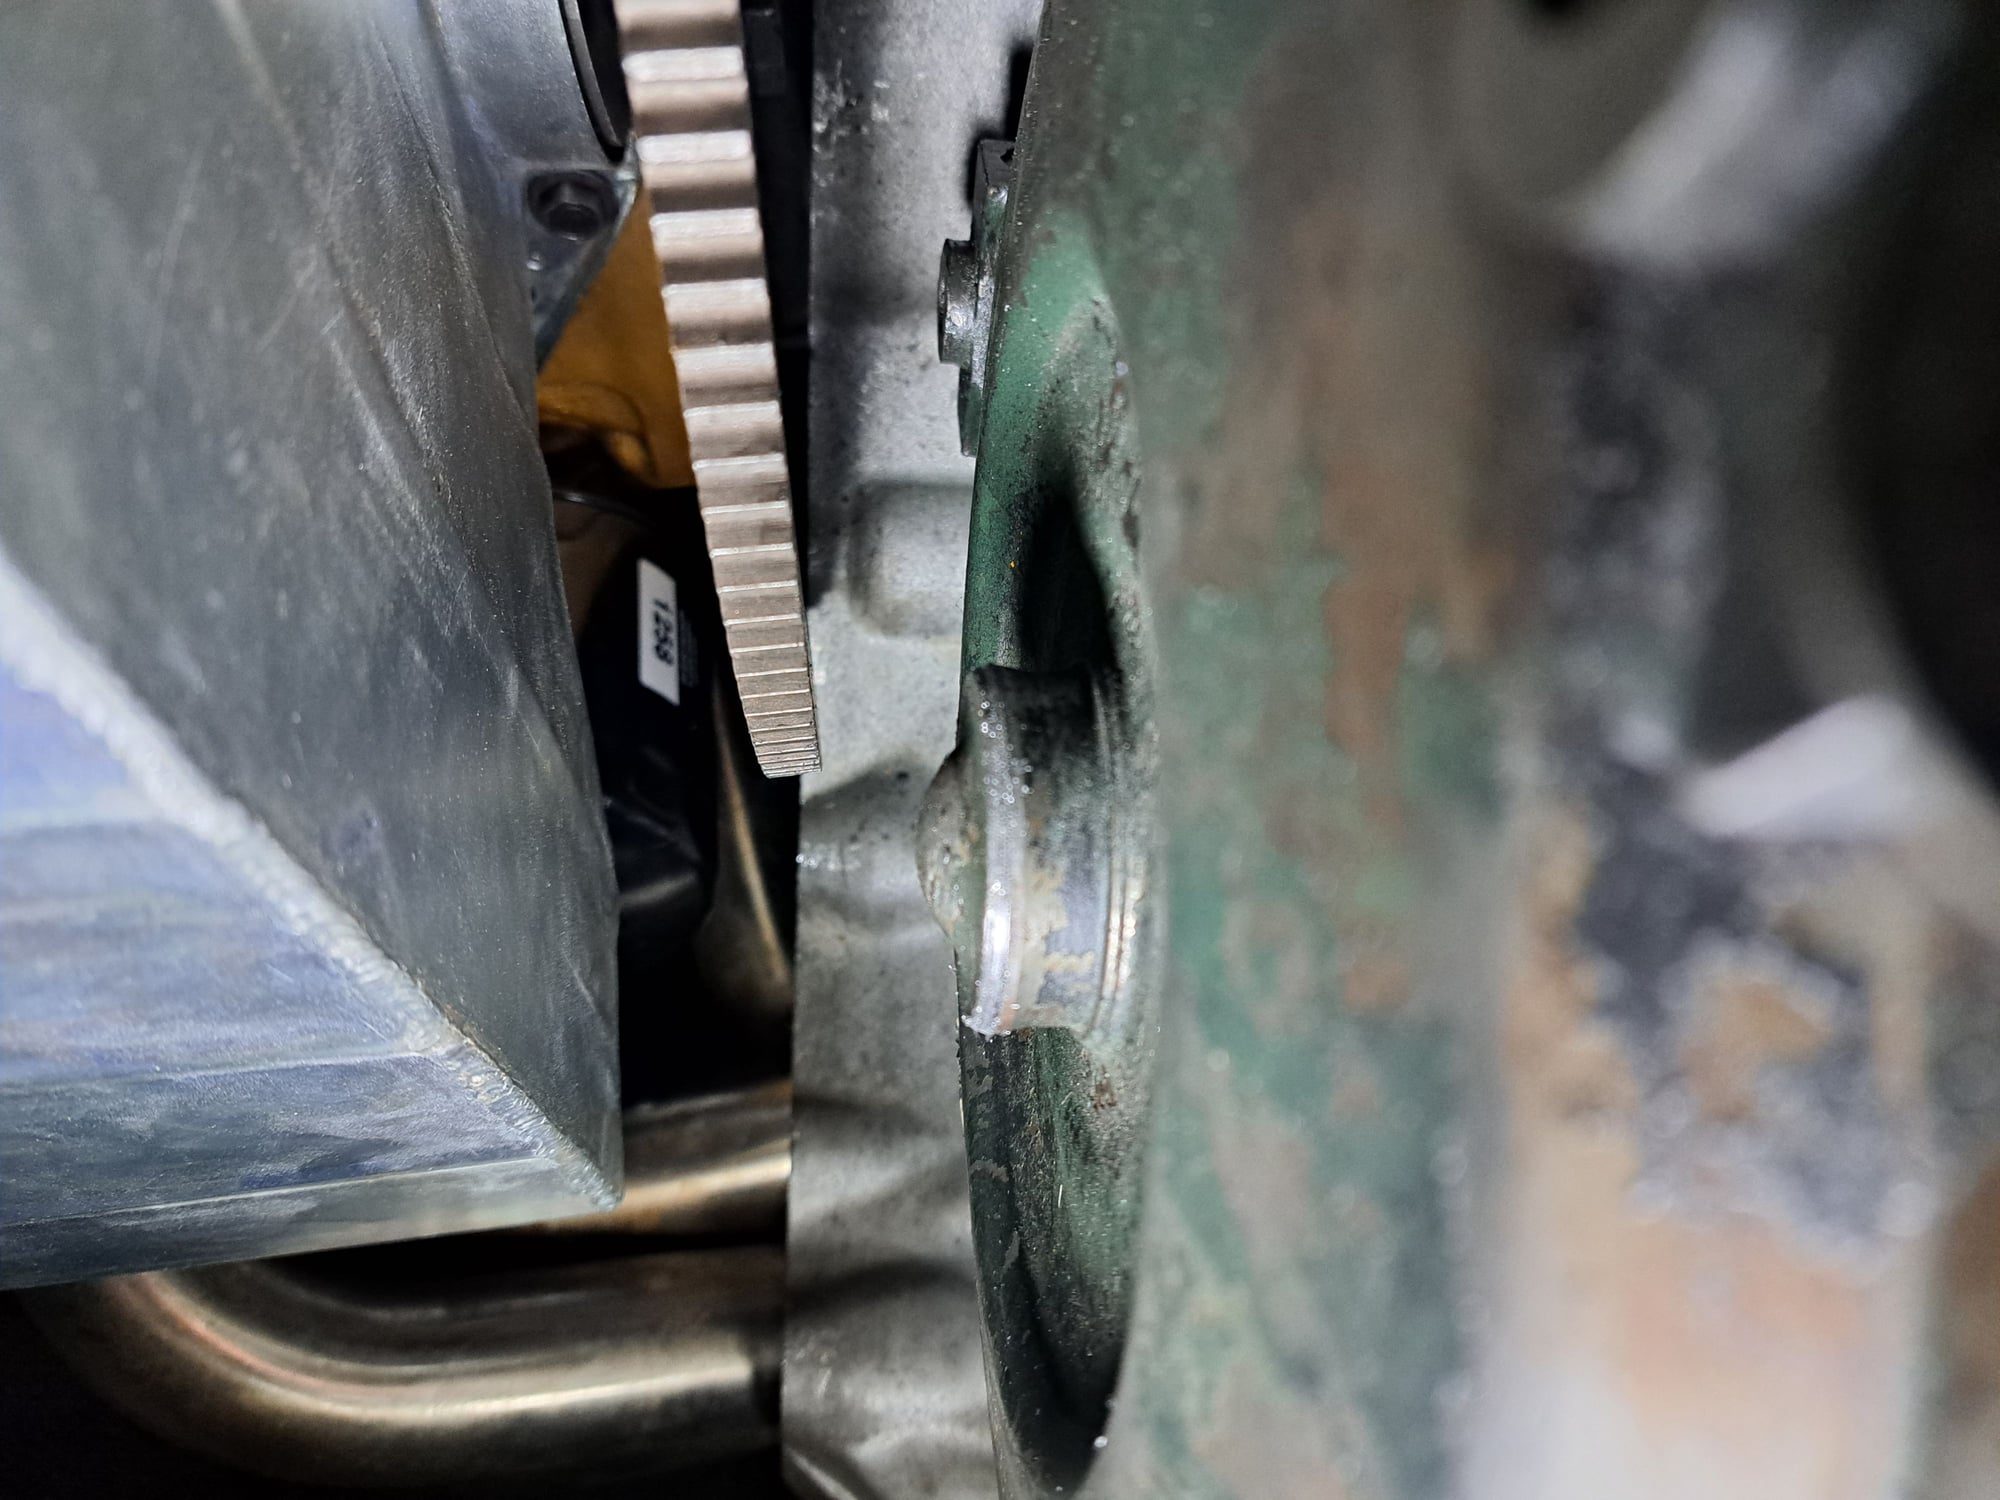
I got everything together underneath except the new TV cable, should be here by next weekend. I figured out the pan mounted dipstick will not work. The header tube is right by the outlet. They should have moved it an inch or two foward. I have new Spectre chrome dipstick. They fit tight, most don't. I bent the new line from fuel pump to carb. I sure do like the Nickle Copper lines. So bendable, I only had to use my tubing bender at the fuel pump. I also have these lines at trans, super easy to go from TH350 to 2004R. Got the Qjet on, finally got the choke working like it should. The carb body is damaged, had to space it out slightly or it binds. Then the choke pull off hit the linkage blocking it from fully closing. I bent it slightly, now fully shuts and releases like it should. I got the temp sensor and a couple of other things buttoned up top.
Got the last two bell housing bolts in. Also longer heater hose to the nipple moved up front. Also needed a longer PCV hose. I installed the oil fill tube. I tweaked the fuel line more, put the crank pulley on and got the accessories basically in place. I had extra supports for the serpentine belt setup but they won't connect to the RPM with fuel rails. There is a stud on the PS reservoir and one long bolt by the A/C delete pulley. So a turnbuckle to the PS reservoir to the alternator bolt. Also a turnbuckle from the bolt near the A/C delete pulley to the far corner serpentine adapter near the head. Basically finish the accessories, add the rad, coolant, ATF, cooling fans, battery, distributor, oil dipstick, TV cable and prime the oil system. Then fire up and break in the cam.
Accessories and belt put on. The rad is on the mounts and mostly filled with 50/50 coolant, put too much on the floor as usual. Basically fans, dipstick, battery, TV cable, ATF, oil prime, distributor wires and fire up.
The TV cable is in, harder than it should be but it is done. I threw in a good amount, probably a gallon plus, it has the deep aluminum trans pan and a 4L60E filter. I got the oil dipstick in, an lightly ground the the raised part to seat it in the block. I needed my 10 pound sledge to seat it with light but solid taps. It is half way between the bottom of the dipstick and the add mark. I saw seepage at the RobMc aluminum water neck O ring. I put a good bead of Optimum Grey in the groove. I will have see if they sell replacement ones. I will let that RTV cure for a day and refill the coolant. I basically need to make sure oil level is good, connect the fans, they are in place, prime, drop in distributor, plug wires and connect the battery.
Well it runs, 20 minute, 2000 rpm break in done. I had to shut it down a couple of times. It ate a serpentine belt, removed a spacer to fix and got a bit hot, around 230, second fan wasn't on. My Davies Craig fan controller apparently died. I had to put both fans straight to the battery. The good, it had nearly 75 psi oil pressure at 2000 rpm with the 30 wt Lucas high ZDDP break in oil. It has 40 psi at 1000 rpm hot. The bad, it has a bit of a tick, not steady, sorta comes and goes. The 2004R still doesn't shift, it may be a fluid level. I kind of think it is the CK pump. I actually removed the CK shift kit and put in a stock valve body, check balls, seperator plate and accumulators. It is still on stands, the TH350 may be going in.
Looks like there is a 3 year warranty on the fan controller, should cost me nothing to replace it. Of course Summit now only have records 18 months back. I will be around 2+ years, sent an email. I topped up the trans, still no shift. The TH350 shifted soft but shifted. I since added the pump and tail shaft seals along with the Transgo big TH350 shift kit. The converter I have for it is the smaller 10" converter nearly all new ones are made from. It is a bolt and nut design, B&M 400002 2000 to 2200 stall econo converter, good to 350 HP. The pads clear the weight on my spare 330 flex plate. I replaced one of the wheels on my trans cart, a 4 wheel mover, it should help moving it under the car. I trimmed the ears on this TH350, it was an absolute bitch to get past the headers and exhaust. It is under the car, time to pull the 2004R. There is a definite tick, I will be checking the rocker arms, see if any have play.
I bought 6 NOS rocker arms and bridges for drivers side, 3, 5 and 7 have minor play. The passenger side was perfect for valve lash. The drivers side must be the head that was only milled once. I believe almost all the rocker arms were replaced but it may be more miles than I think. I will see once they come in, if adjustment to the bridges is needed. I got the TH350 in place, the circumference on that snout needed ground down or it would not spin. The depth was fine, no contact with the pilot Only maybe washer worth of space between the flexplate and torque converter. Cooler lines and TV cable on. I need to remove the chrome pan and take the dent out. This POS better last till I go 4L80E.
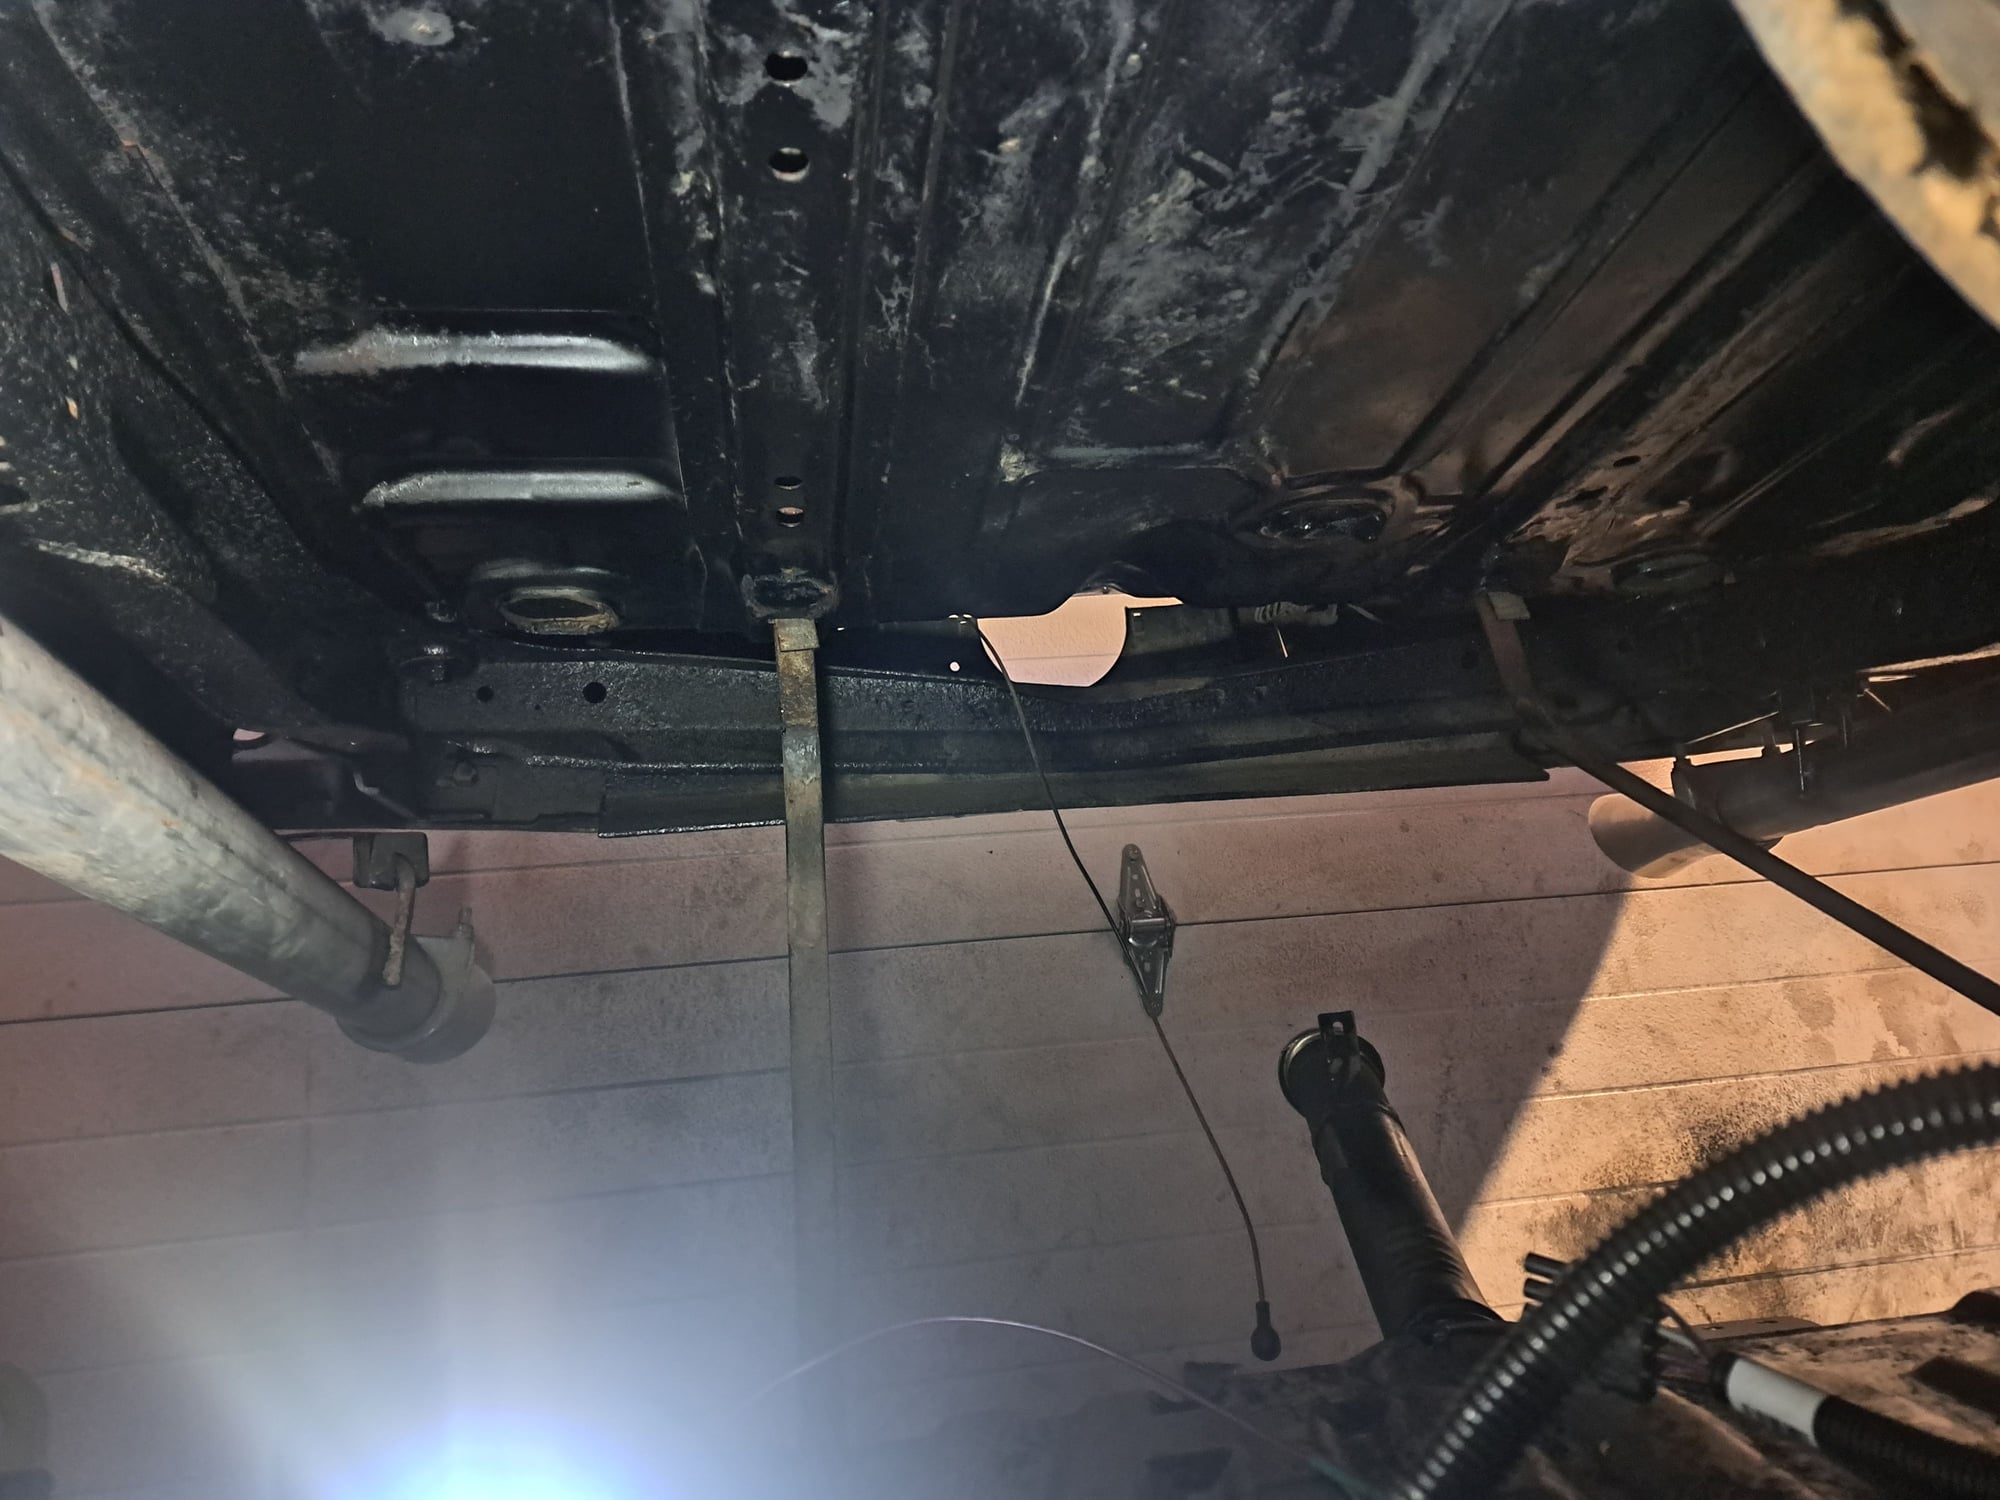
The TH350 is done and filled it with fluid. True to old GM automatics, it has a minor drip, my fault this time. I had to flatten the pan again, dented by the drain plug and pulled the boss away from the pan. My 20 pound sledge got it pretty flattened and back in place I added rubber and steel drain plug washer, it isn't a drip, only seepage. I removed an intake vacuum plug and added an extra nipple for the TH350 modulator hose. I also shortened the vacuum advance hose. I decided to do some more investigation into the Davies Craig fan controller. No power to the ignition wire on the controller. Turns out the ignition fuse popped, changed it, powered up. You can see by the pic why I can't use the pan mounted dipstick. Yes, the stainless exhaust is shiny. Here are some pics.


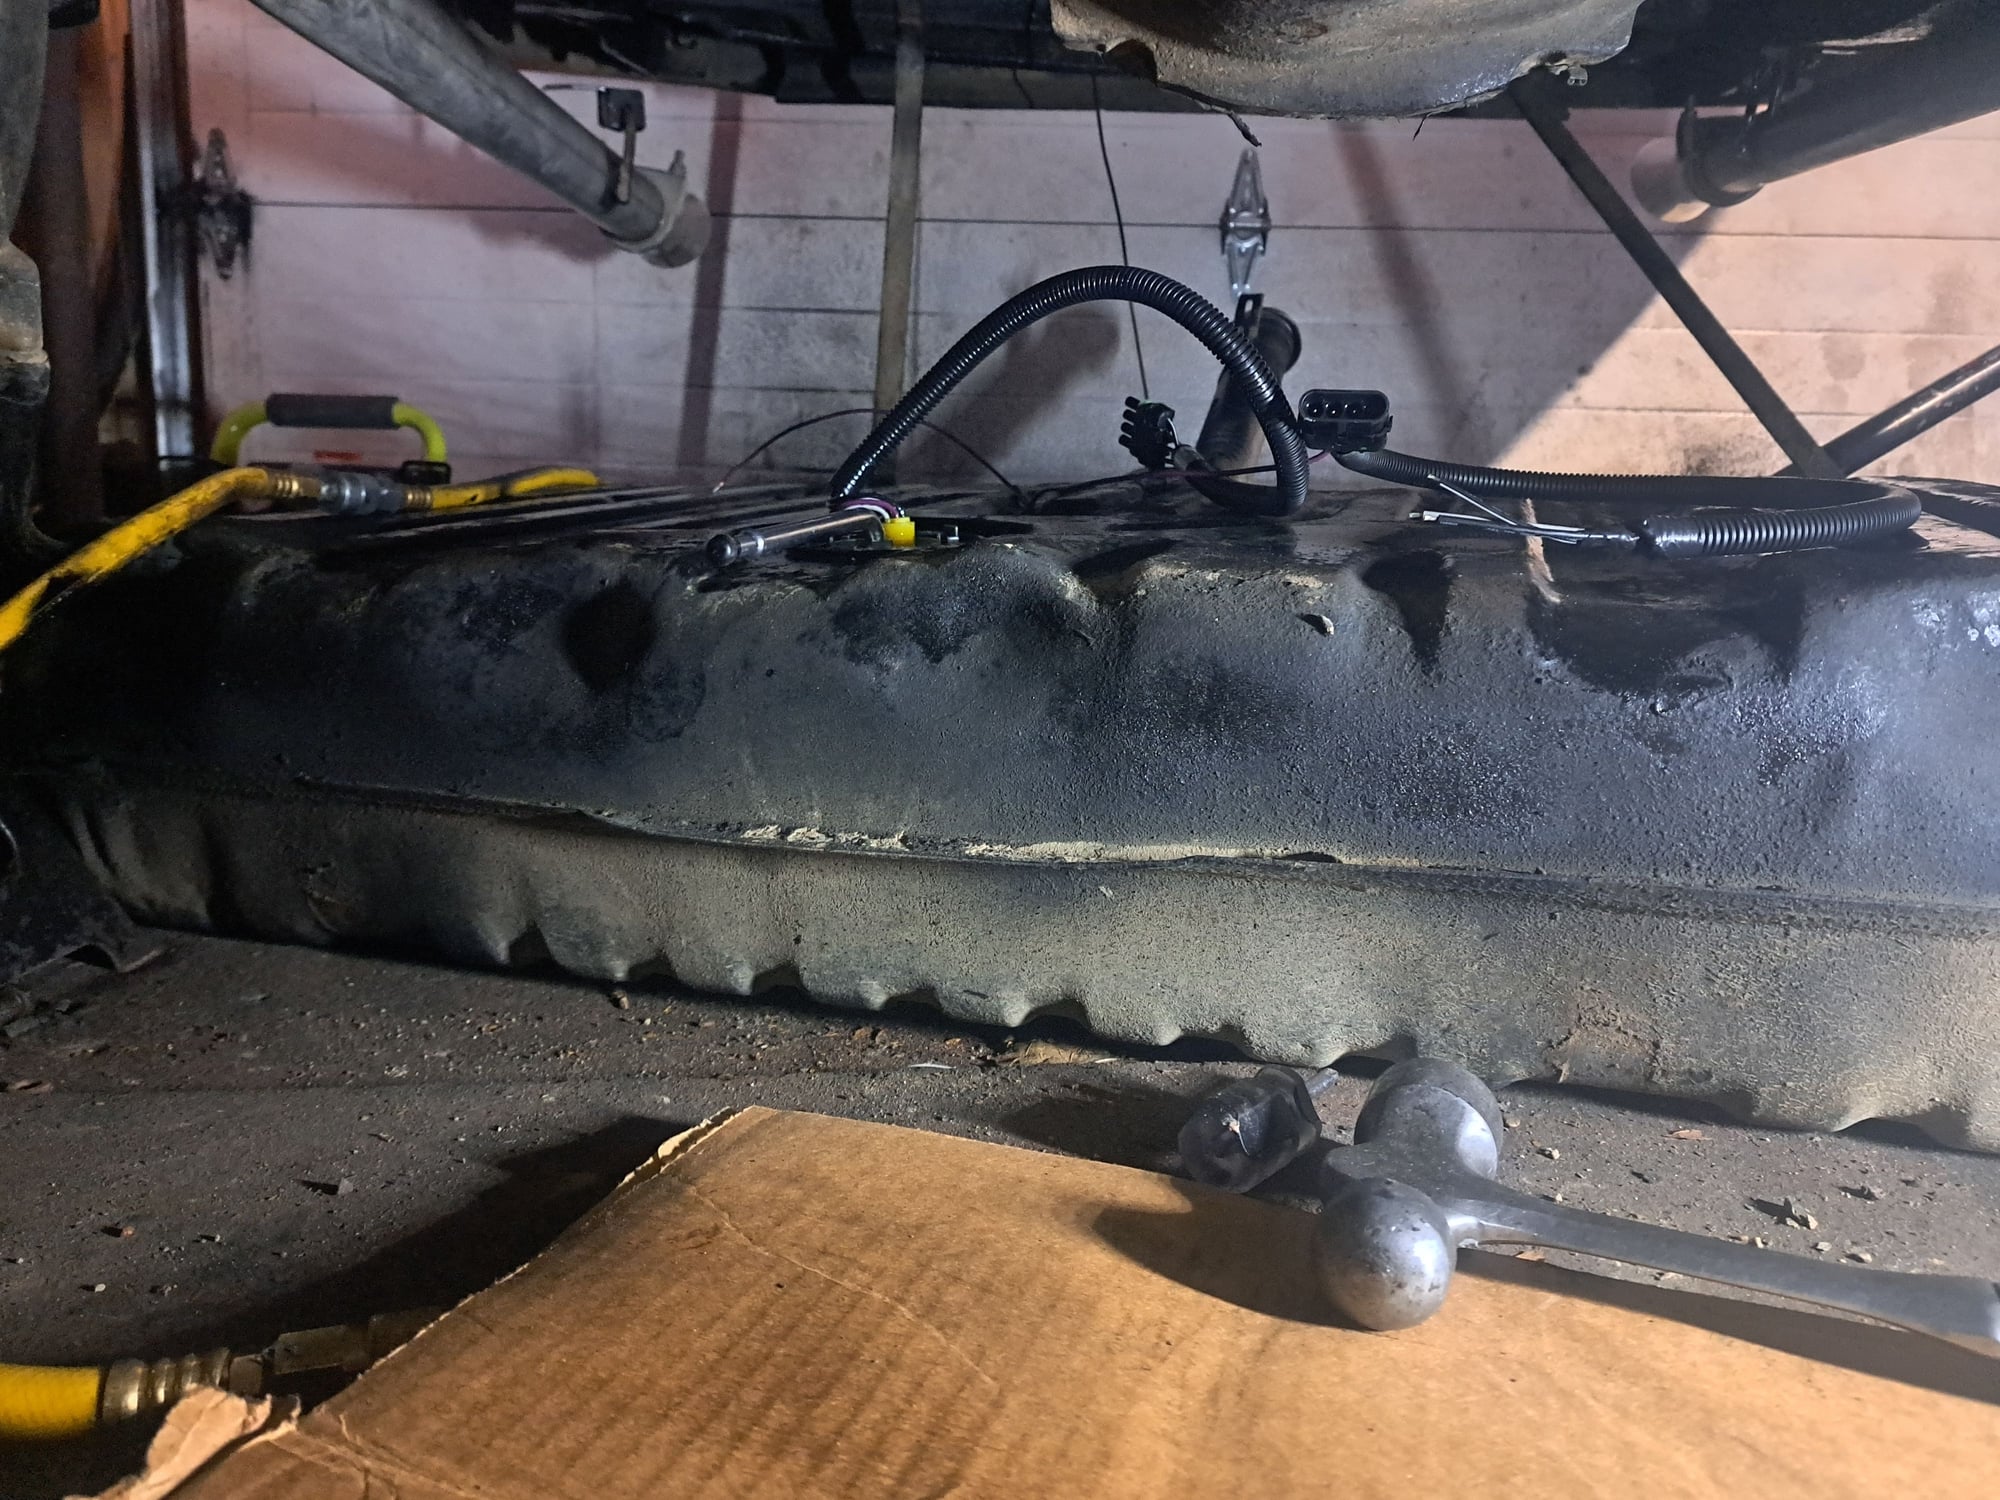
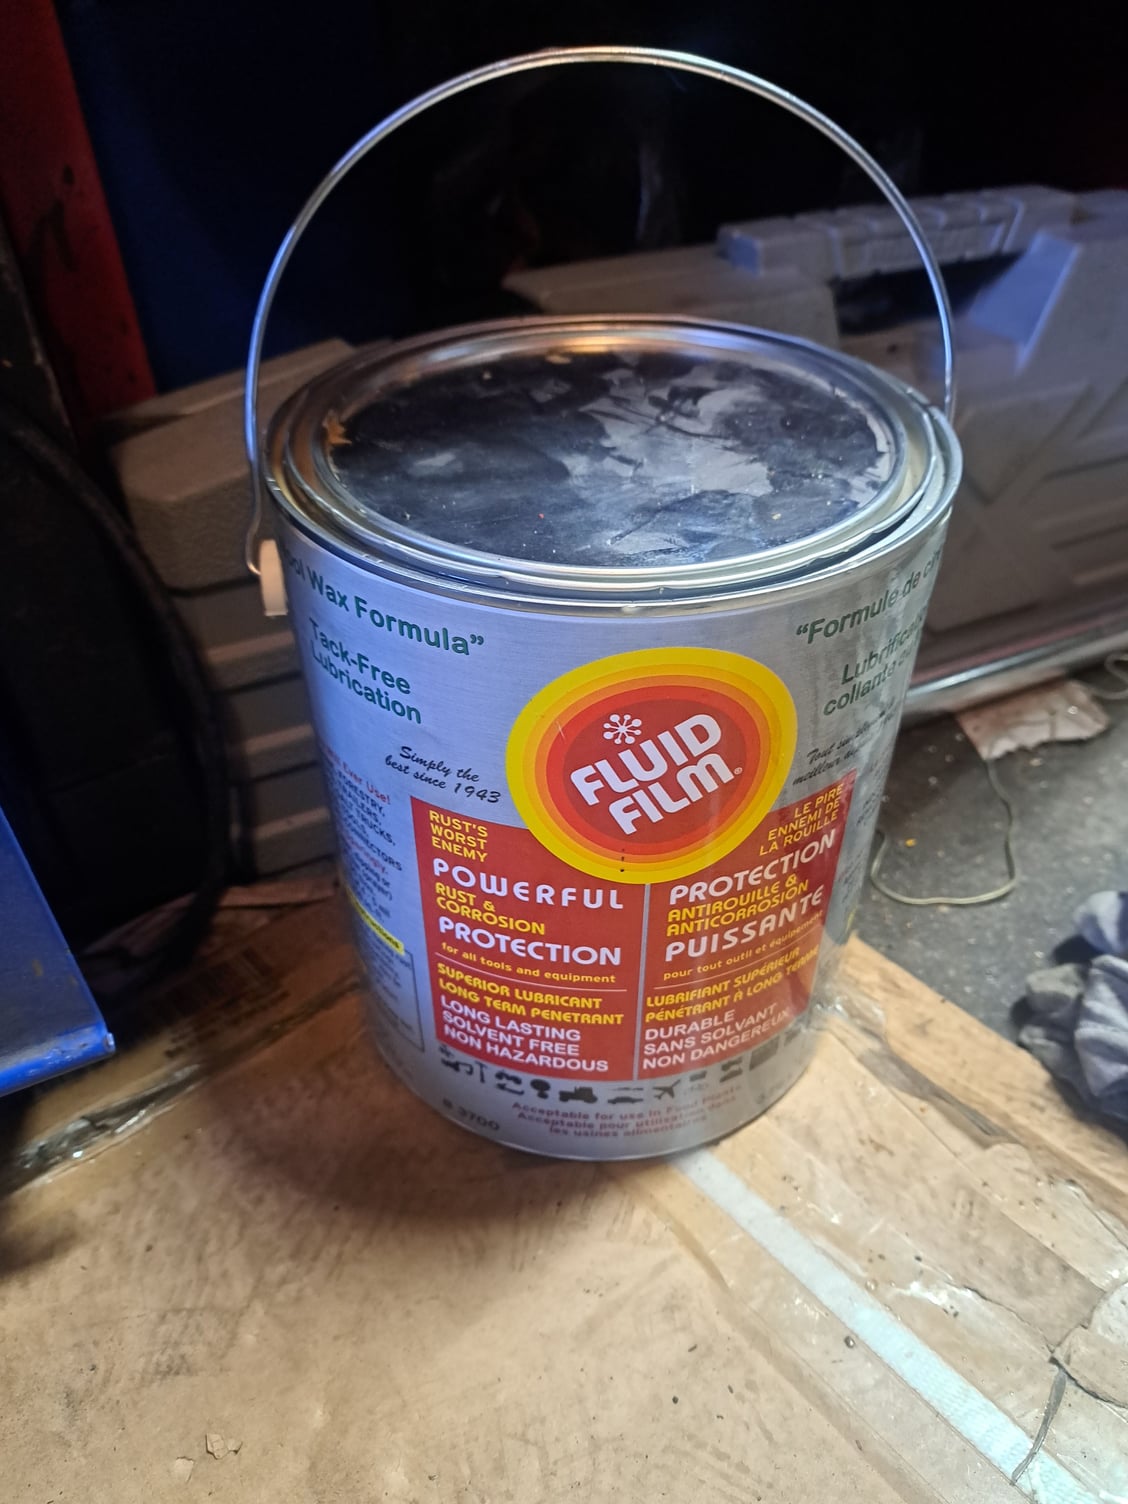
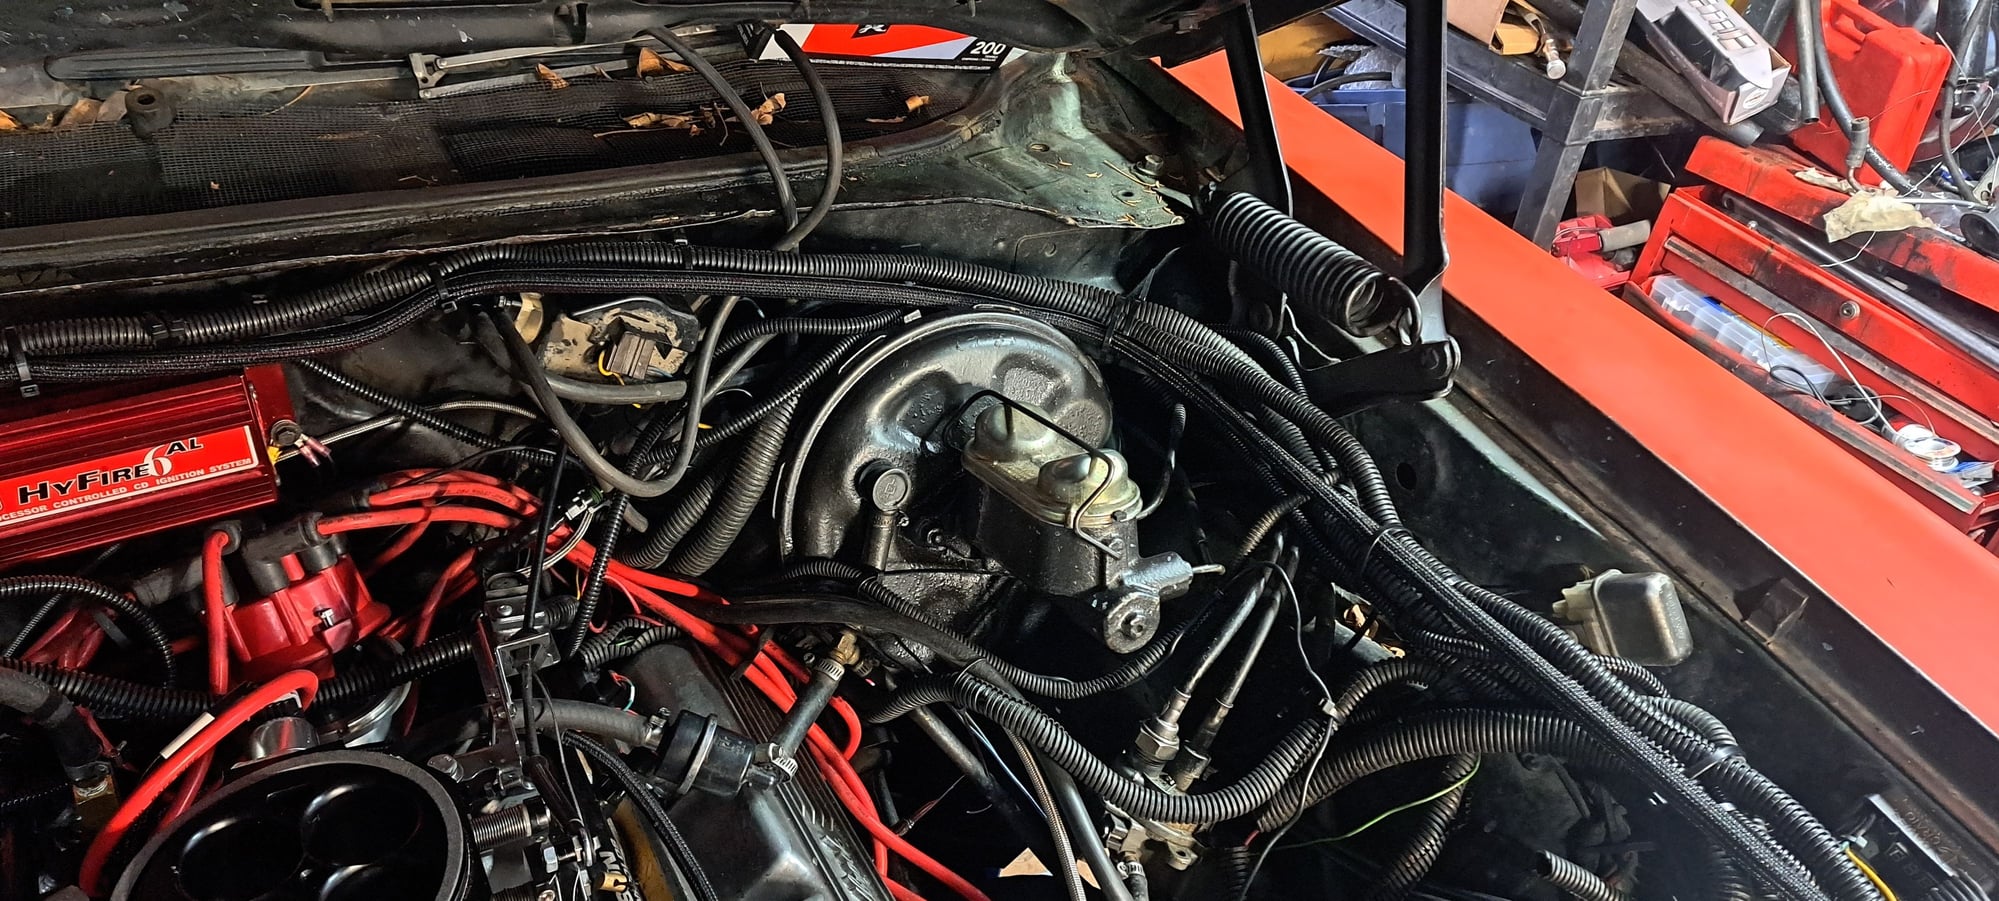
Finally the weather improved, I wasn't working in my shop in -25C highs last weekend plus my Wife was off. This weekend she is working nights, so plenty of time. First I had to address the TH350 leak. I know an old GM trans leaking, shocking. I thought it might be the pan or pump seal. Nope the speedo seal. So I grabbed an O ring out of the TH4L60E seal kit in first and found the little push in seal in a drawer, looks exactly like seals they sell online for the TH350 bullets. Slowed it down from a slow drip to barely wet after sitting overnight. I brought the motor to 0 and the rotor to #1. I soldered the wires together on the Accel dual sync, not sure why they don't combine them together. They plug into each other and a not included and no longer available adapter harness. Cutlassefi said just combine them together. Basically 12 volt red, white signal and black ground. Two additional black with rings to ground. I mounted the Mallory Hyfire box and MSD noise capacitor and Accel Super Stock coil. The injector adapters fit nicely. The IAC fits and clicks, TPS fits but doesn't click. I hooked up the power brake booster to a manifold nipple, modulator and PCV also to manifold nipples. I hooked up the rear EFI rail crossover and the the 30 micron cleanable 8AN filter. I also changed just the oil filter, still some glitter but less than the last time. No doubt some didn't come out. I plan on just running this oil to make sure the EFI works properly then will change the oil and filter again with VR1 10W30 and a Wix 51258. I ordered a different oil filter cutter, my All Star Performance one deserves no stars, works like crap. The Motomaster OE Plus are well made oil filters, really hard to cut through. A small amount glitter from my Daughter's 2017 Hyundai Eltranta. She way overfilled the oil. Uses oil and the dipstick is really hard to read. I bought a Protec by Wix, $2 cheaper. I see 5000 mile claims, said 10,000 mile on the box. I want see if it is built as well as the Wix/Napa Gold 51258, a variation of that part number. I put it on and filled it with the last of the old SL rated 1100 Zinc and 1200 Phos 10W30 Quaker State Defy 10W30 I have probably had for 5 years. I soaked down the tank straps. I just need to change the hose at the sender where the new Holley pump drops, one spot near the front, where it connects to mechanical fuel pump. Pretty sure the mechanical pump was dying no fuel in the line or the carb when I took them off.
Attachments
-

20240110_170121.jpg
3 MB · Views: 0 -

20240110_170113.jpg
3.3 MB · Views: 0 -

20240110_170012.jpg
1.6 MB · Views: 0 -

20240121_120107.jpg
3.1 MB · Views: 0 -

20240121_113744.jpg
2.3 MB · Views: 0 -


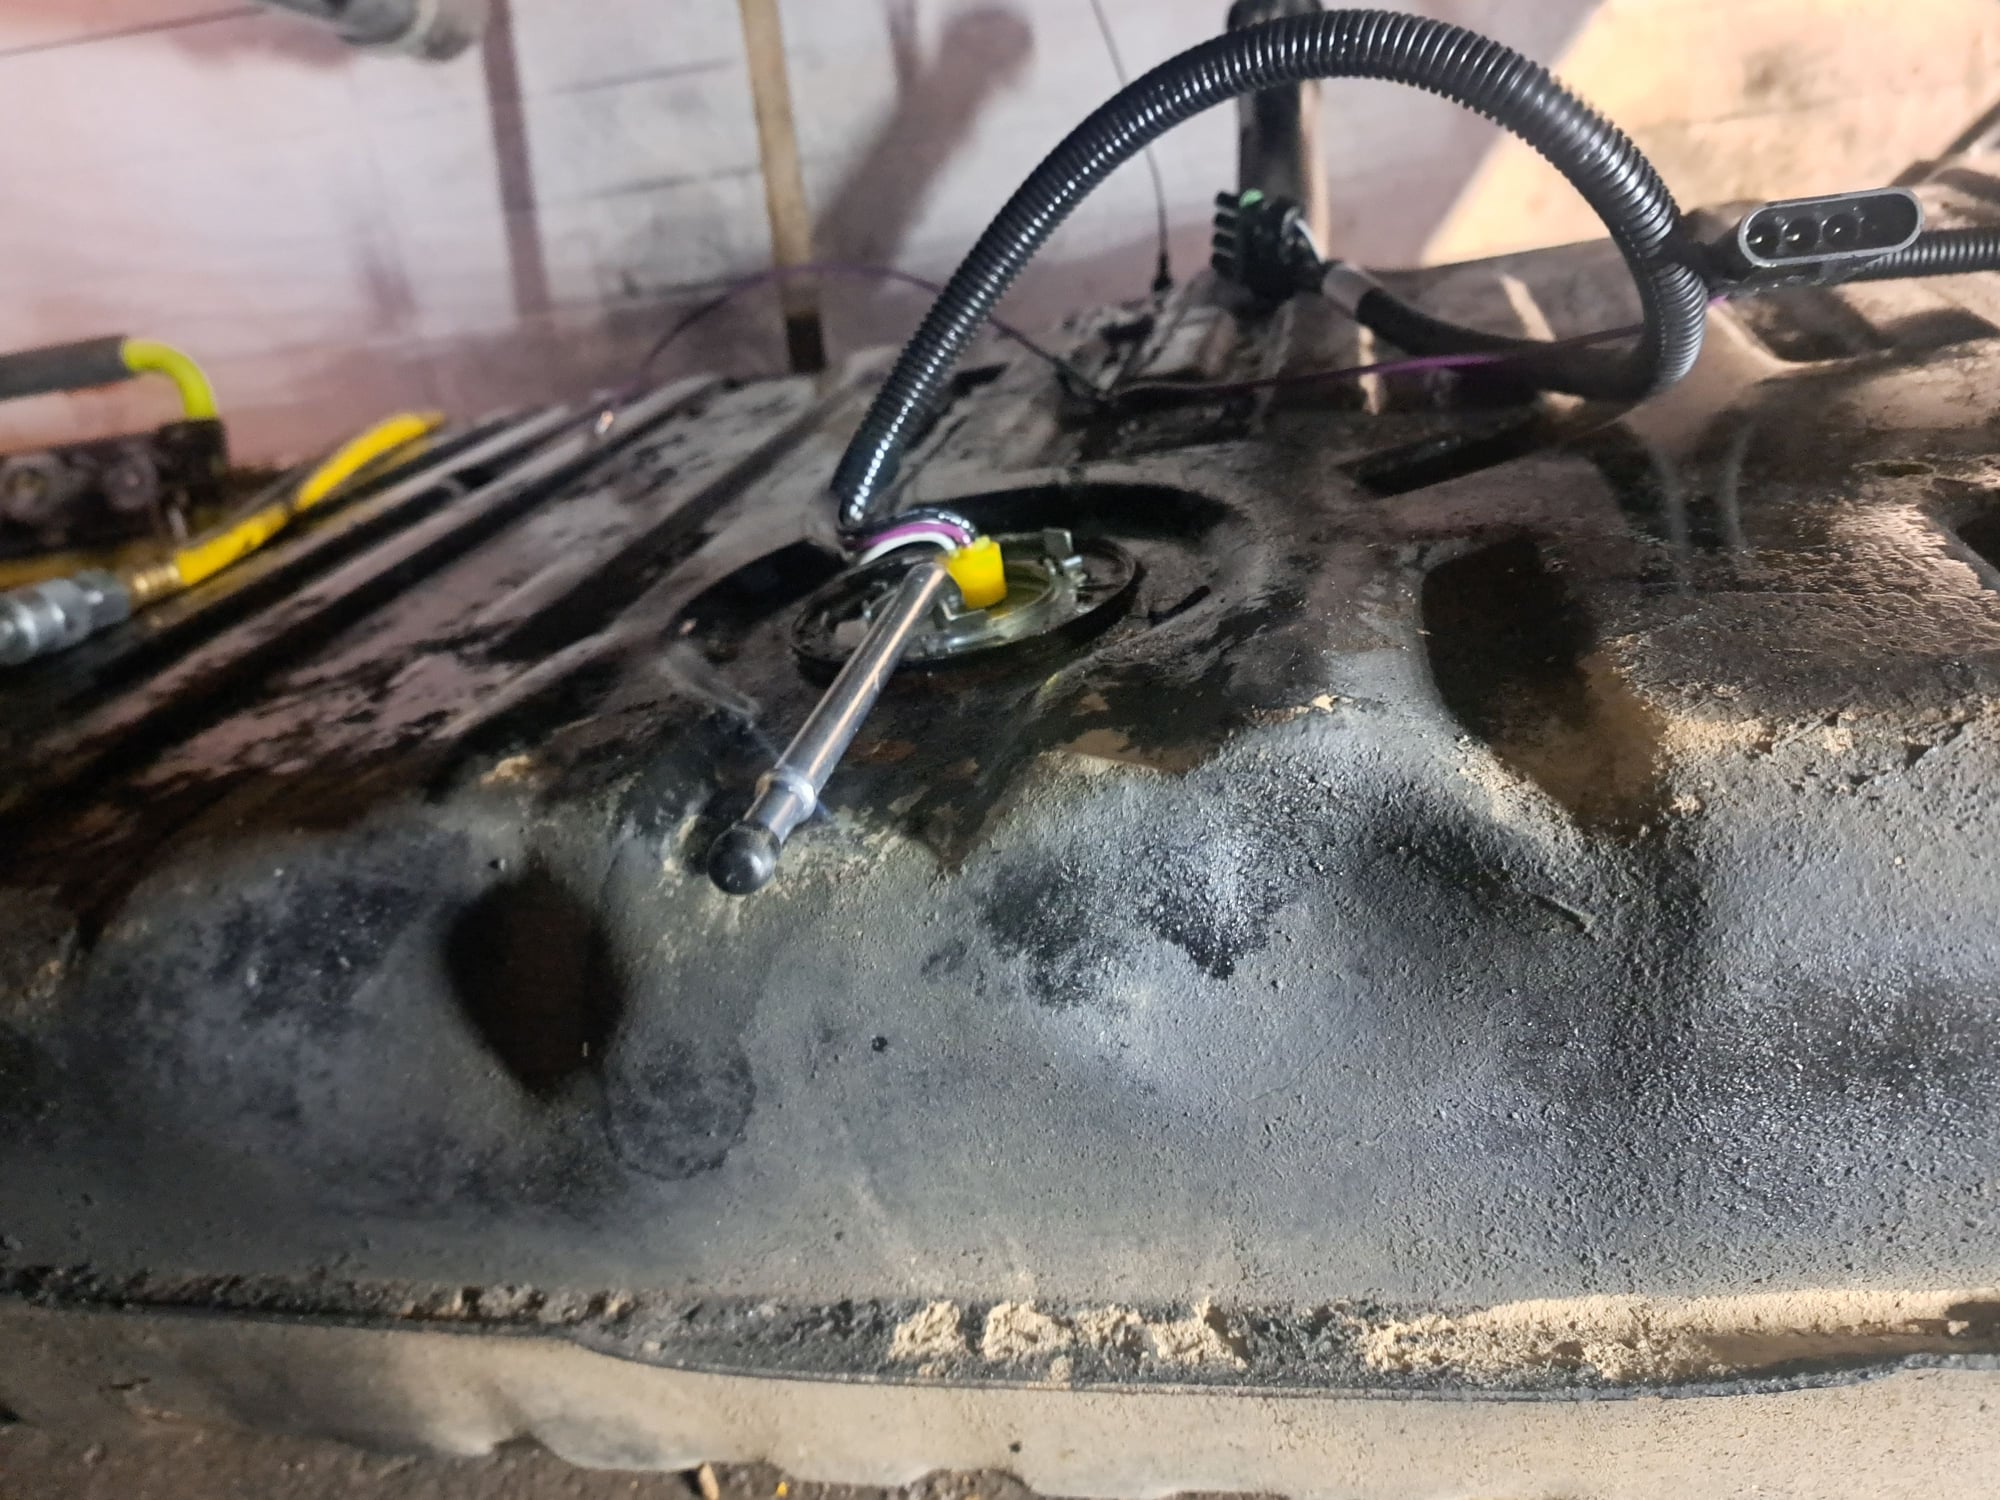
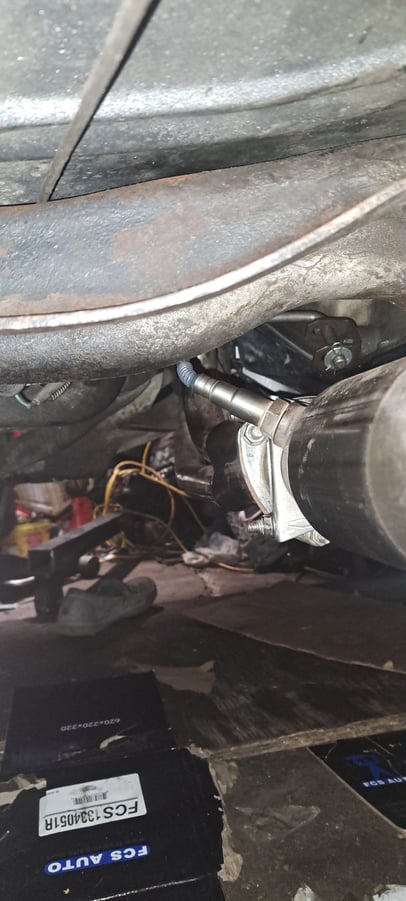
I basically spent the weekend getting the fuel system ready for SEFI. I added the 30 micron fuel filter with EFI rated braided hose with twist together 8 AN fittings and EFI clamps at the motor. I also replaced the one small piece just behind the motor with braided hose and EFI clamps. I dropped the fuel tank. I painted underneath it and I picked up a pail of Fluid Film on 1/2 price. I didn't realize it was not fluid, concentrated like nasty butter scotch pudding. I put it on the tank straps, anti seize on the tank bolts. I covered the top with some paint the 3M sound deadner. I got it cheap on sale, can see why, it gets brittle quickly. Suprised 3M stuff is usually top of the line. To get the O ring on the Holley drop in fuel pump assembly, it needed split in half. Also needed to split it, to put it in. I lengthened the wire for the gauge so the fuel pump power reaches as far as possible. I cut more braided hose, added another 8AN twist together fitting100 mimcronfuel filter just after the pump outlet connected with Dorman EFI clamps. I doubled the clamps at every connection. I just need another 8AN fitting and filter bracket and it is plumbed. I also had to add an 3/8" NPT to 1/4" adapter, drill it out and cut off just enough of the threads to expose the Delphi manifold air temperature sensor. I didn't want to have to pull the intake, only 1/4" fittings in the RPM intake. I moved the PCV and added a brass tee to combine it with the transmission modulator. I added the MAT just in front of the throttle body.
I got the new temp sensor for the Terminator, actually swapped spots with the heater hose, further down in the intake. I added the oil pressure sensor for the oil that the Terminator reads. I also ordered the 8 AN to 1/8 NPT to install the same sensor for fuel pressure just before the rail. The Amazon sensors are about 1/10 the price of the Holley sensors which aren't included! The other fittings and brackets and brackets showed up. I routed and secured the 100 micron fuel filter just above the rear axle. I installed the Mr.Gasket fuel pump relay and added a wire from the negative battery post to the fuel pump as Holley required. I had a spare 12 volts key on wire. It was just long enough for wire length between the Holley harness and the fuel pump relay wiring. Soldered, heat shrunk, all wire loomed and insulated hod downs throughout. I routed it down the passenger side. Turned on the key, could hear the fuel pump kick on and build pressure, lines squeaked and no leaks! I also broke down and got a MSD dual sync distributor on sale, which is plug and play with the Terminator harness.
Last edited:
I ordered a 10 micron element for my filter to replace the 30 micron element and different throttle and kickdown bracket with more adjustment, more solid and looks better from Amazon. I clocked my O2 sensor for the wideband and the Holley EFI at the angle Holley recommends and installed the Terminator X Max O2 sensor in the passenger side cat, now dual O2 sensors. I installed more of the sensors and I connected the thick red and black Mallory Hyfire box wires to the MSD noise capacitor. Will wire the rest of the ignition box today, distributor should be here by next weekend, along with the other parts.
The Hyfire box and main power are wired and routed. Most stuff connected, just need to figure out final routing and where to put the ECM.


So a couple of little things. The different throttle/kickdown cable bracket arrived, should work better. Also the 10 micron fuel filter element arrived. I ordered an LS knock sensor harness for dual sensors off the block and a second sbc truck knock sensor, thinking that would plug into the Holley harness, nope. They used a 3 pin plug, which doesn't really exist for knock sensors! Holley only sells a replacement for the one I already have! I think I found a couple of plugs I can make work. Basically the third wire is a ground. I have diagram and colours. I really don't want to cut the Holley main harness anywhere. I can cut the LS plug off the knock sensor harness and found the frequency for these truck sensors to program into the Terminator X Max. Getting closer to fire up!
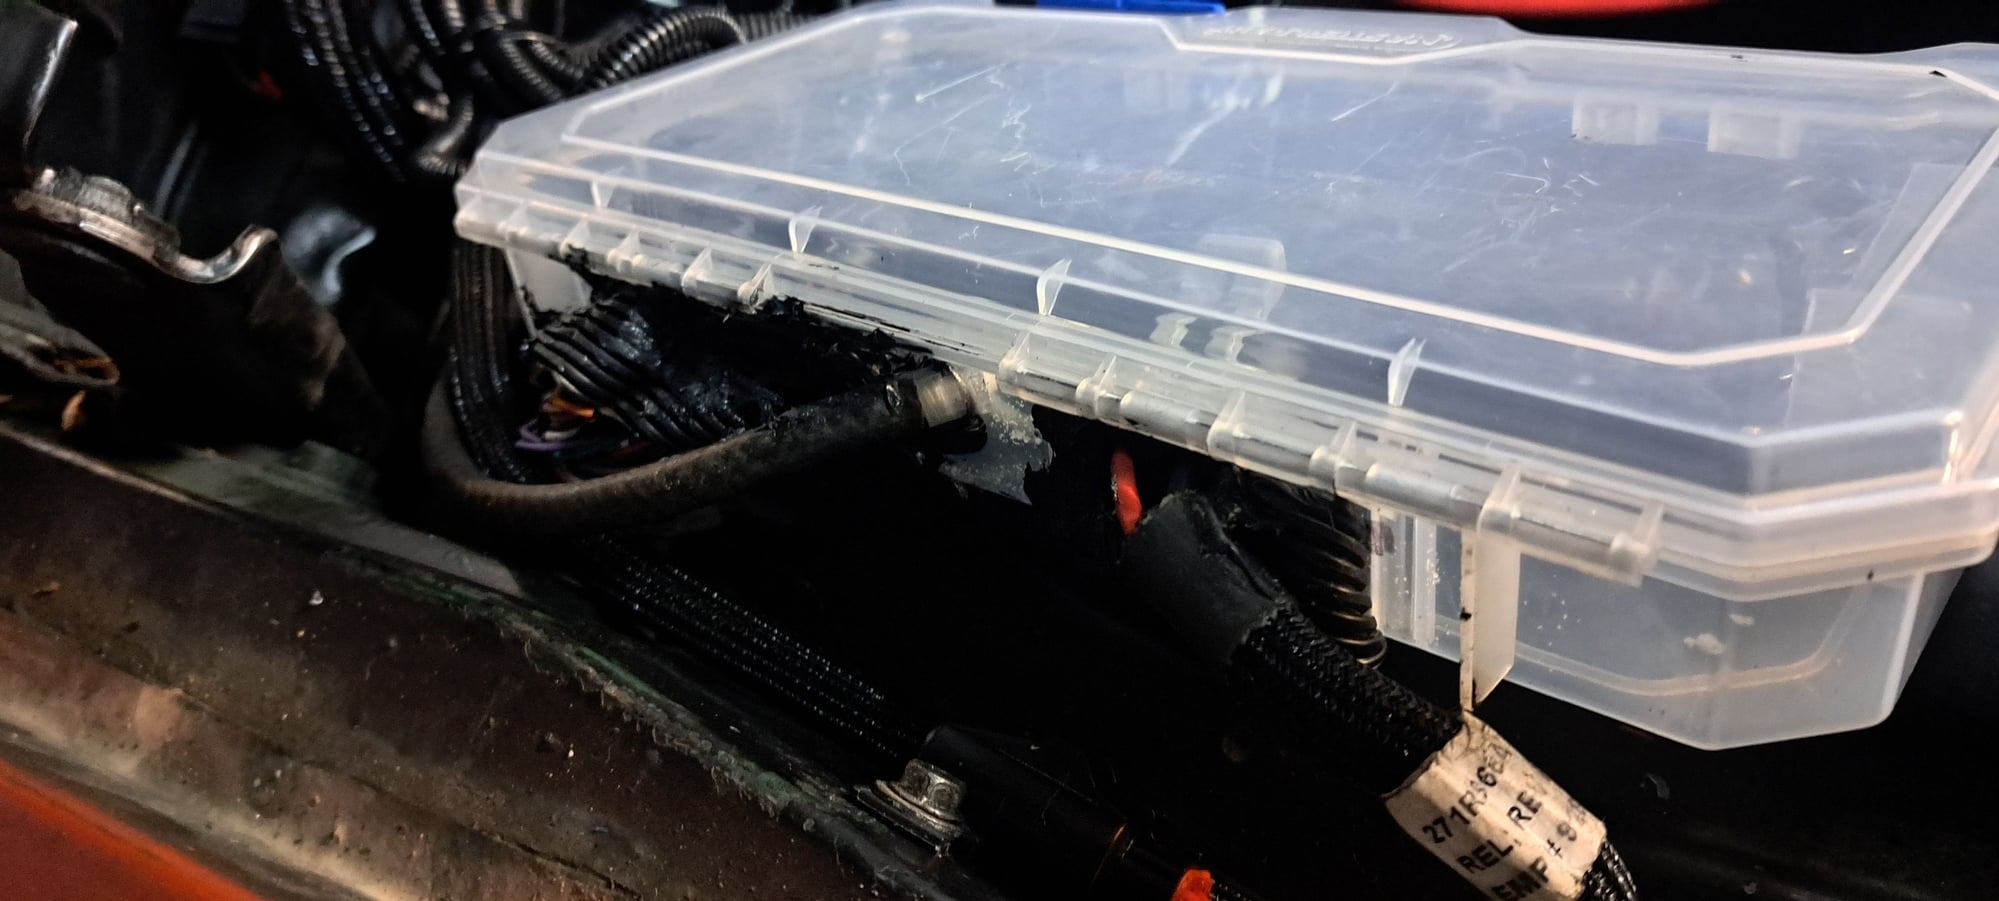
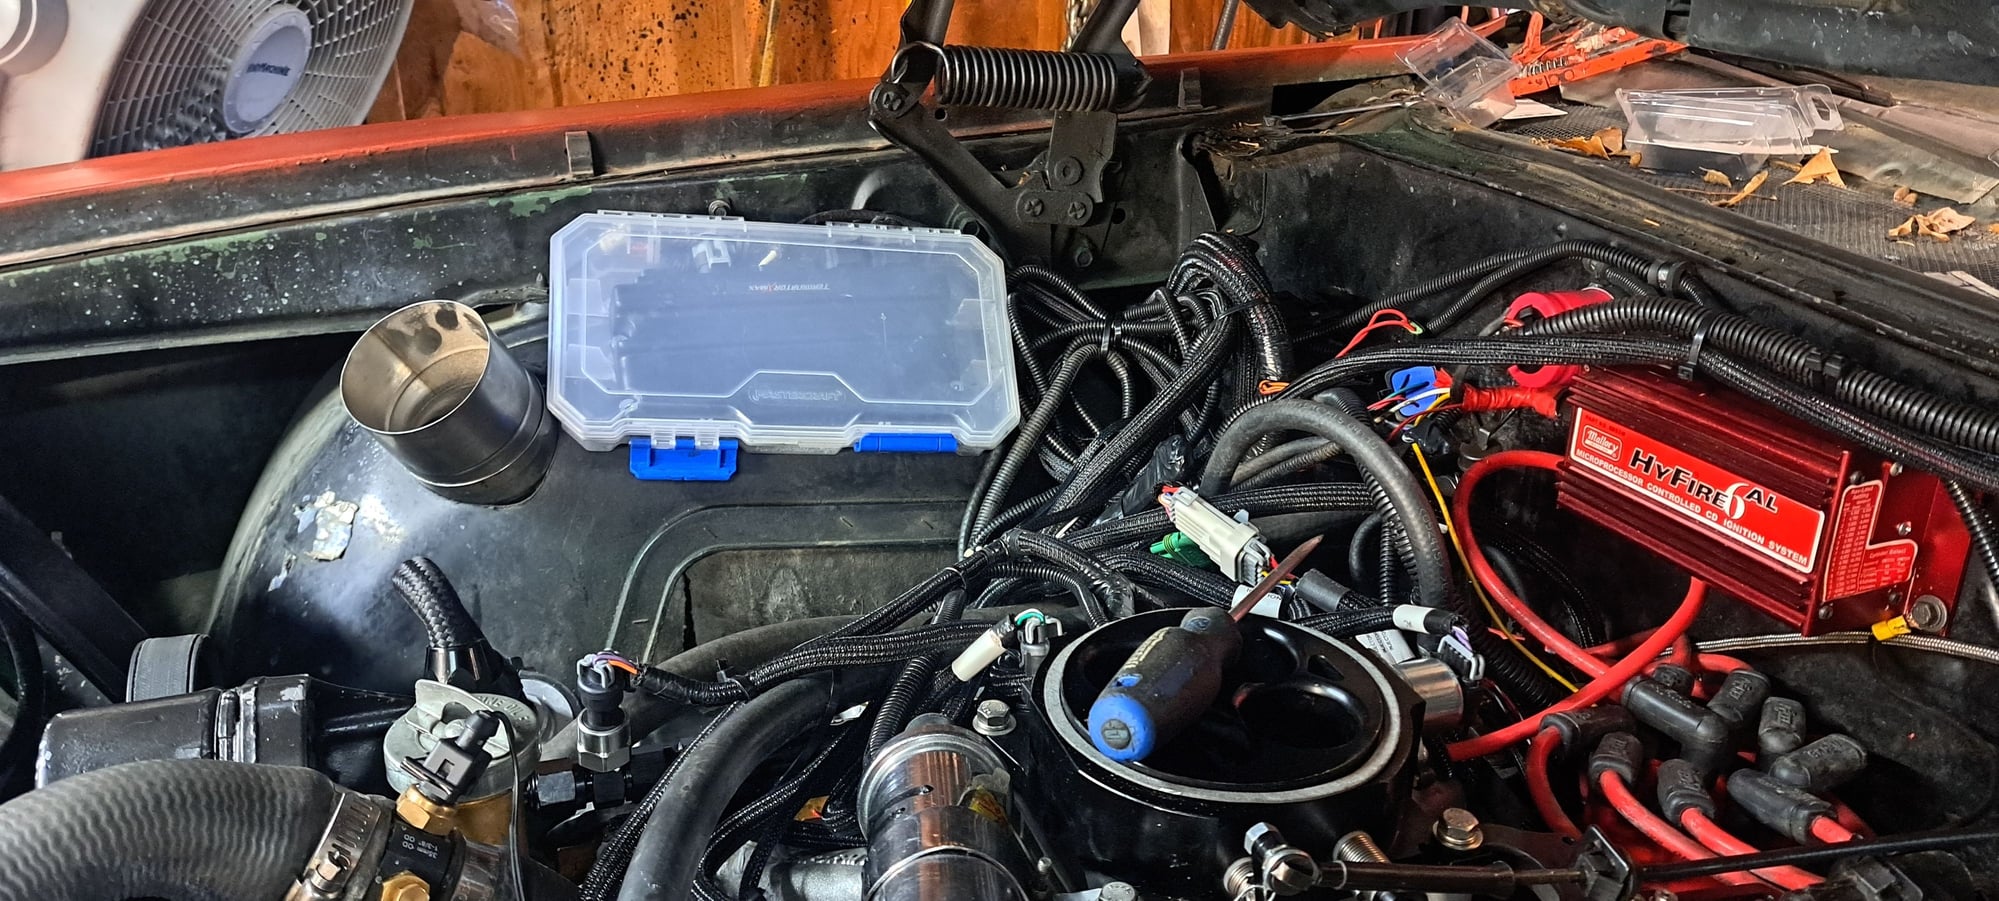
Ok, so I installed the MSD Dual Sync distributor. It plugged right in, lined up #1 at 50 degrees as in the instructions, just need to check the LED for the sensor alignment. I also modified a 3 wire crank sensor plug to plug into the knock sensor plug into the Terminator X Max. The crank sensor plug needed the plastic ground down on the sides of the male plug to fit in plug. I cut off the plug for the two wire plug to the knock sensor and matched the wiring to tge two knock sensors and grounded it to the valve cover. I wanted the X Max ECM under the hood. I looked at $200 US boxes, nope! I found a $10 small parts container. It had middle dividers, I cut down but it is off the bottom of the box a little bit. I hole sawed and drilled for the three electrical plugs and MAP sensor hose. I put wire covering around the holes. I like that I can open it and access the ECM but is well sealed from moisture. Also the 10 micron fuel filter element is wrong so I ordered a whole filter, I will run the 30 micron to to fire it up and do a basic tune check. I installed the new throttle and kick down cable bracket, should work better.

Edit Quote Multi
Edit Quote Multi
I got to the Tuning Wizard, realized two things. I want the Terminator to control the fuel pump. It can run pumps up to 15 amps or just trigger them. Key on through the Mr.Gasket fuel pump relay isn't going to cut it. I actually unplugged the relay pissing around with this. Second, I didn't know my injector size. I asked Mark, he was pretty sure they are 50 pound Holley injectors. I was thinking 20 degrees as the static timing setting. I did find one small fuel leak last night at the drivers side crossover while messing with the distributor, hopefully the only one. I will do a good check over before switching the fuel pump wiring. Hopefully a fire up later today!
Similar threads
- Replies
- 1
- Views
- 3K
- Replies
- 0
- Views
- 3K
Latest posts
-

-
SBO serpentine kit adapter plates With mechanical fuel pump
- Latest: Olds 307 and 403